









Why Highly Filled TIM Materials Settle — And What It Does to Your Dispensing Process
Introduction
You validated your thermal interface material application. The shot weight was right, the coverage was even, the thermal resistance numbers came in where you needed them.
Then, three weeks into production, the numbers start drifting. Thermal resistance is up. Bond line thickness is inconsistent. Shot weight is varying shot-to-shot even though nothing in the process has changed.
The material changed. Not the formula — the distribution. The fillers settled.
Nobody did anything wrong. The supplier's W/m·K number is honest. The pump moved exactly what it was told to move. The designer specified the right compound. Stokes' law was simply operating the whole time the pail sat on the shelf, and it doesn't read the production schedule.
This is one of the most common and least diagnosed problems in TIM dispensing — see Equipment Selection for Abrasive TIMs for the full pump and valve picture, and TIM dispensing for EV batteries for application-specific requirements. It is one of several failure modes in TIM dispensing, and it gets worse the longer the container sits between shifts.
What Is Filler Settling in Thermal Interface Materials?
Thermal interface materials — pastes, gap fillers, and phase change compounds used in electronics cooling, EV battery modules, and power electronics — achieve their thermal conductivity through high loadings of dense filler particles. Alumina, boron nitride, silver, zinc oxide, and similar materials are suspended in a carrier fluid, typically a silicone or epoxy base.
The problem is physics, and the physics has a name. Stokes' law describes how fast a particle falls through a fluid: settling velocity rises with the square of the particle diameter and with the density difference between particle and carrier, and falls with the viscosity of the carrier. Every term in that equation works against a highly filled TIM. The particles are dense — alumina at roughly 3.9 specific gravity, silver at over 10 — and the carrier is engineered to flow. Given time and gravity, the filler migrates downward. The longer the container sits undisturbed — overnight, over a weekend, during a shift break — the more pronounced the separation.
The same law tells you which materials are most at risk. Silver settles faster than alumina. A coarse-particle grade settles faster than a fine one. A low-viscosity carrier lets go of its filler faster than a thick one. A pail that has sat for twelve weeks is not simply twice as settled as one that sat for six.
The result is a container that is no longer homogeneous. The bottom is filler-rich, highly viscous, thermally conductive. The top is filler-depleted, thin, and thermally poor. As you dispense down through it, you are effectively dispensing a gradually changing material — not the compound you characterized.
What Happens at the Bottom of the Pail
Settling is not the end of the story. Once particles reach the bottom they begin to pack. The interstitial gaps between them collapse, the carrier fluid is squeezed out, and what was a dense suspension becomes a consolidated cake.
That cake behaves very differently from the material above it. The force needed to move fluid between closely packed particles rises steeply as the gap between them closes — roughly with the inverse cube of the gap. The practical consequence is that a pail's resistance to remixing does not increase gradually with time on the shelf. It stays manageable for a while and then climbs sharply. This is the startup torque spike anyone who has put a drill mixer into an old pail has felt, and it is why time-on-the-shelf is a poor proxy for how much work it will take to restore the material.
It is also why one low-tech step matters: if a pail has been sitting for weeks, scrape the consolidated layer off the bottom with a wooden paint stick before any mixing. Breaking the cake mechanically lets the mixer do its job in a reasonable cycle rather than fighting a puck.
How Filler Settling Shows Up on the Line
The defect signatures of filler settling are easy to misdiagnose because they look like viscosity problems or pump calibration issues.
Increasing shot weight over a container. As you work down into a filler-rich zone, the material thickens. In a time-pressure system, the same pressure and time produces a heavier shot. In a positive displacement system, the motor load increases. Either way, shot weight drifts.
Inconsistent thermal resistance measurements. If your process has inline or end-of-line thermal testing, you will see thermal resistance climb as filler-depleted material reaches the dispense head. The chemistry is correct — the distribution is wrong.
Bond line thickness variation. Filler-depleted material is lower viscosity and spreads further under compression. Filler-rich material is thicker and resists spread. Bond line thickness varies across the container's life even with identical dispense parameters.
Visible separation. In severe cases — a container left undisturbed for days — you will see a clear layer of carrier fluid sitting on top of the material surface. This is unmistakable evidence of phase separation.
First-shot quality variation at shift start. After any production break, the first shots dispensed contain material that has been sitting static. These shots are consistently different from mid-run shots, producing a startup scrap window at the beginning of every shift.
Why It's Worse in High-Fill, High-Value TIMs
Filler loading in thermal interface materials ranges from roughly 50% by weight in general-purpose grades to 85–90% in the highest-conductivity formulations. The higher the loading, the denser the filler phase, the greater the density gap to the carrier, and the stronger the settling tendency. A practical rule of thumb: if the material's specific gravity is above about 1.5, assume it settles.
At high fill levels, even a short static period — a 20-minute break, a line stop while a robot fault is cleared — can begin the separation process. The filler doesn't have to travel far in a viscous carrier to create a measurable difference in thermal performance.
The cost amplifier is that high-performance TIMs are expensive. Silver-filled compounds used in power module assembly can run to hundreds of dollars per kilogram. Dispensing filler-depleted material means you are not only producing off-spec parts — you are leaving the most expensive fraction of every pail behind as a cake on the bottom.
Your Supplier Already Told You to Fix This
Read the technical data sheet for almost any filled TIM and you will find some version of "agitate thoroughly before use." Suppliers know their material settles; the instruction is there because the W/m·K on the datasheet was measured on a homogeneous sample, and that number is only reproducible if the filler loading at the nozzle matches the loading on the certificate of analysis.
So the question is not whether settling is real. The supplier has settled that for you. The question is whether your method of agitation actually restores the loading — and whether it does so without creating a different problem.
Why Conventional Agitators Don't Solve This
The default answer on most production floors is a drill with a paddle, or a bladed agitator mounted in the container. Both do move filler back into suspension. Both create new problems.
Air entrainment. Agitation that creates vortexing, splashing, or surface turbulence pulls air into the material. As discussed in our post on MFS vacuum material feed systems, entrained air in a 2K or filled material degrades shot quality, affects mix ratio, and creates voids in the cured compound. In a thermal interface layer, a void breaks the conductive path entirely — the thermal resistance of an air gap is orders of magnitude higher than the surrounding compound. One bubble in the wrong place is a localized hot spot.
Shear damage. A blade applies high, uneven shear. Some TIM formulations are shear-sensitive, and aggressive mixing can alter their rheology or break down the structure that gives them their application properties.
No endpoint. A drill mixer has no way of telling you when the material is homogeneous. The operator stops when it looks mixed, which usually means the top looks mixed while the cake is still on the bottom.
Open container. Blades, shafts, and open lids are contamination paths and moisture-ingress paths, which matters for moisture-cure chemistries and any material with a documented shelf life after opening.
How a Gyroscopic Mixer Keeps Filler in Suspension
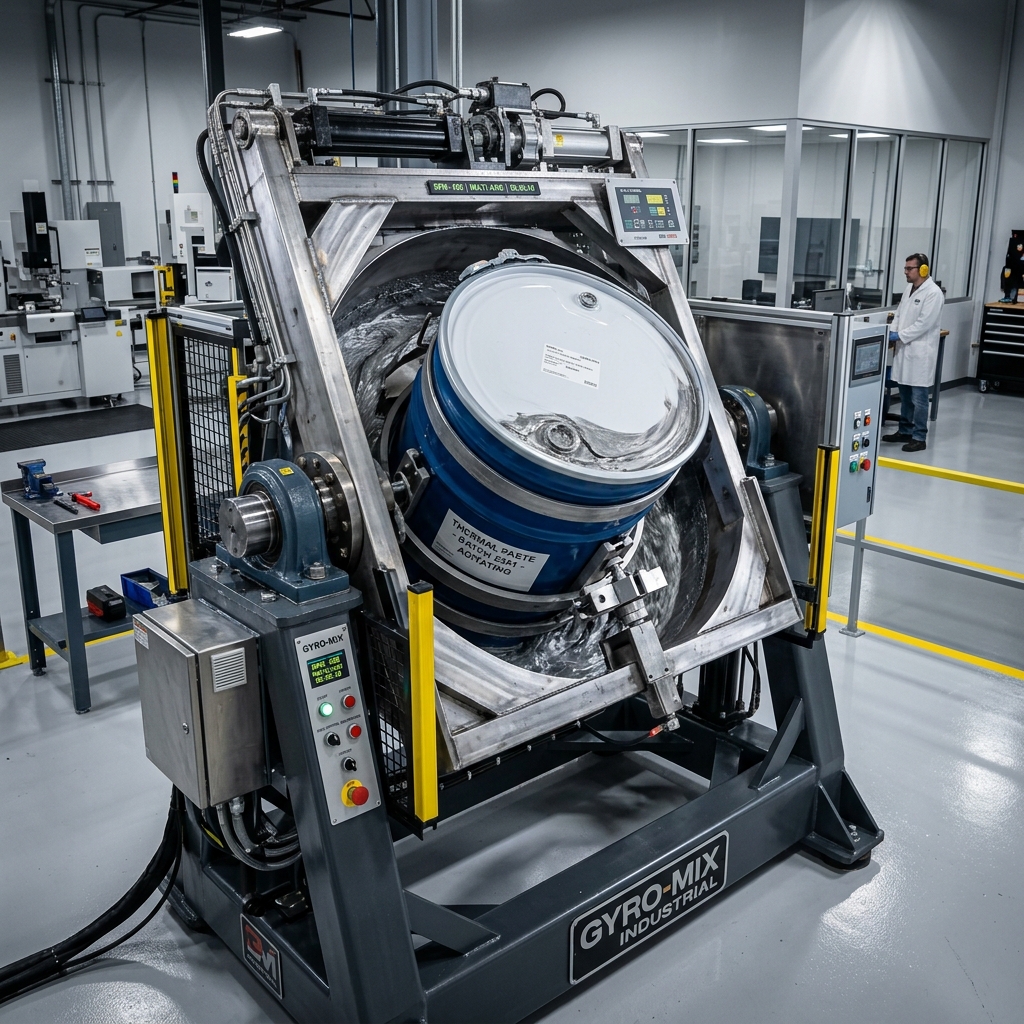
The StokesIt gyroscopic mixer from Dispense Robotics rotates the sealed container about two perpendicular axes at once. The container is loaded upright — quart, gallon, or 5-gallon pail — and is never turned on its side. One axis is driven; the other spins freely, the way a globe or a top does. The combined motion continuously re-orients the material inside the pail so that gravity is never pulling in the same direction for long.
Filler that has begun to settle is carried back into suspension with each rotation cycle. The motion is low-shear: it redistributes rather than mechanically agitates, so it does not introduce air and does not damage shear-sensitive formulations. There is no blade, no shaft penetration, and no open surface. The lid stays on.
Because the cycle is driven, it can also be defined. Stokes' law works in reverse: given particle size, carrier viscosity, filler density, and how long the pail has sat, you can calculate an agitation recipe — a time and speed that restores the loading — rather than guessing. That turns "agitate thoroughly" on the TDS into a number.
The practical result: the material going onto the pump is the material the supplier certified. From there, a vacuum material feed system holds it — continuous circulation under vacuum keeps the filler in suspension and the air out through the life of the pail. The mixer restores the spec; the feed system keeps it.
When You Need a Gyroscopic Mixer
Not all dispensed materials settle significantly. Unfilled adhesives, sealants without heavy pigments, and materials with matched-density filler systems may be stable enough that a gyroscopic mixer adds no process value.
You need one when:
- You are dispensing filled TIMs with a specific gravity above roughly 1.5, or a filler loading above 50% by weight
- Your thermal performance specification has a tight tolerance — common in EV battery, power module, and LED assembly
- You see first-shot quality variation at shift start or after any line stop
- The TDS instructs you to agitate before use and you have no controlled way of doing it
- You are running expensive silver-filled or high-conductivity compounds where filler distribution directly determines part qualification
- Your production schedule includes overnight or weekend downtime with material remaining in the container
Frequently Asked Questions
What is filler settling in thermal interface materials?
Filler settling occurs when the dense thermally conductive particles in a TIM — alumina, boron nitride, silver, zinc oxide — migrate downward through the carrier fluid under gravity, following Stokes' law. The rate depends on particle size, the density difference between filler and carrier, and carrier viscosity. The result is a non-homogeneous container: filler-rich and viscous at the bottom, filler-depleted and thin at the top. Dispensing through a settled container produces shots with inconsistent thermal conductivity and shot weight.
How does filler settling affect thermal performance in electronics assembly?
Thermal conductivity rises steeply with filler loading, so a modest loss of filler in a shot shows up as a disproportionate rise in thermal resistance. More heat is retained at the component junction rather than transferred to the heat sink. In power electronics and EV battery modules where junction temperatures are managed to tight limits, a settled TIM application can cause overtemperature, derating, or field failure.
Can you remix settled TIM material before dispensing?
Yes, and the supplier's datasheet generally tells you to. The question is method. Bladed or drill agitation entrains air, which creates voids in the cured compound, and applies shear that can alter sensitive formulations. It also gives no indication of when the material is homogeneous. A gyroscopic mixer restores homogeneity with the container sealed, using low-shear rotation and a defined cycle, without air ingress or material degradation.
What is the difference between a gyroscopic mixer and a drill or drum agitator?
A drill mixer or drum agitator uses a bladed or paddle mechanism submerged in the material, applying direct shear in an open container. This entrains air, can damage shear-sensitive compounds, and depends on the operator to judge the endpoint. A gyroscopic mixer rotates the sealed container about two axes simultaneously — the material re-orients and re-suspends through gentle tumbling. No blade contacts the material, no air is introduced, the container stays closed, and the cycle can be calculated from the material's properties.
The Bottom Line
Filler settling is a slow process that runs silently in the background of every production shift. By the time it shows up as failed thermal testing or out-of-spec bond lines, you have already dispensed a significant volume of non-conforming material.
The supplier's number was honest. Your equipment did what you asked. The law of physics in between is the only thing that needs managing, and it is manageable: restore the loading before the pail goes on the pump, then hold it there. The material arriving at your dispense head is the material you qualified — every shot, every shift, every pail.
If your TIM process shows startup variation, bond line inconsistency, or drifting thermal resistance measurements that can't be explained by equipment or parameter changes, filler settling is the first place to look.
See the StokesIt 360 & 400 gyroscopic pail mixers, or contact us to size one for your material and container.
Gavin Petersen of Dispense Robotics has spent 30+ years in industrial fluid dispensing, including senior roles at Graco. He works directly with manufacturing engineers to diagnose dispensing process failures and specify the right automation.